
Development Environment Setup
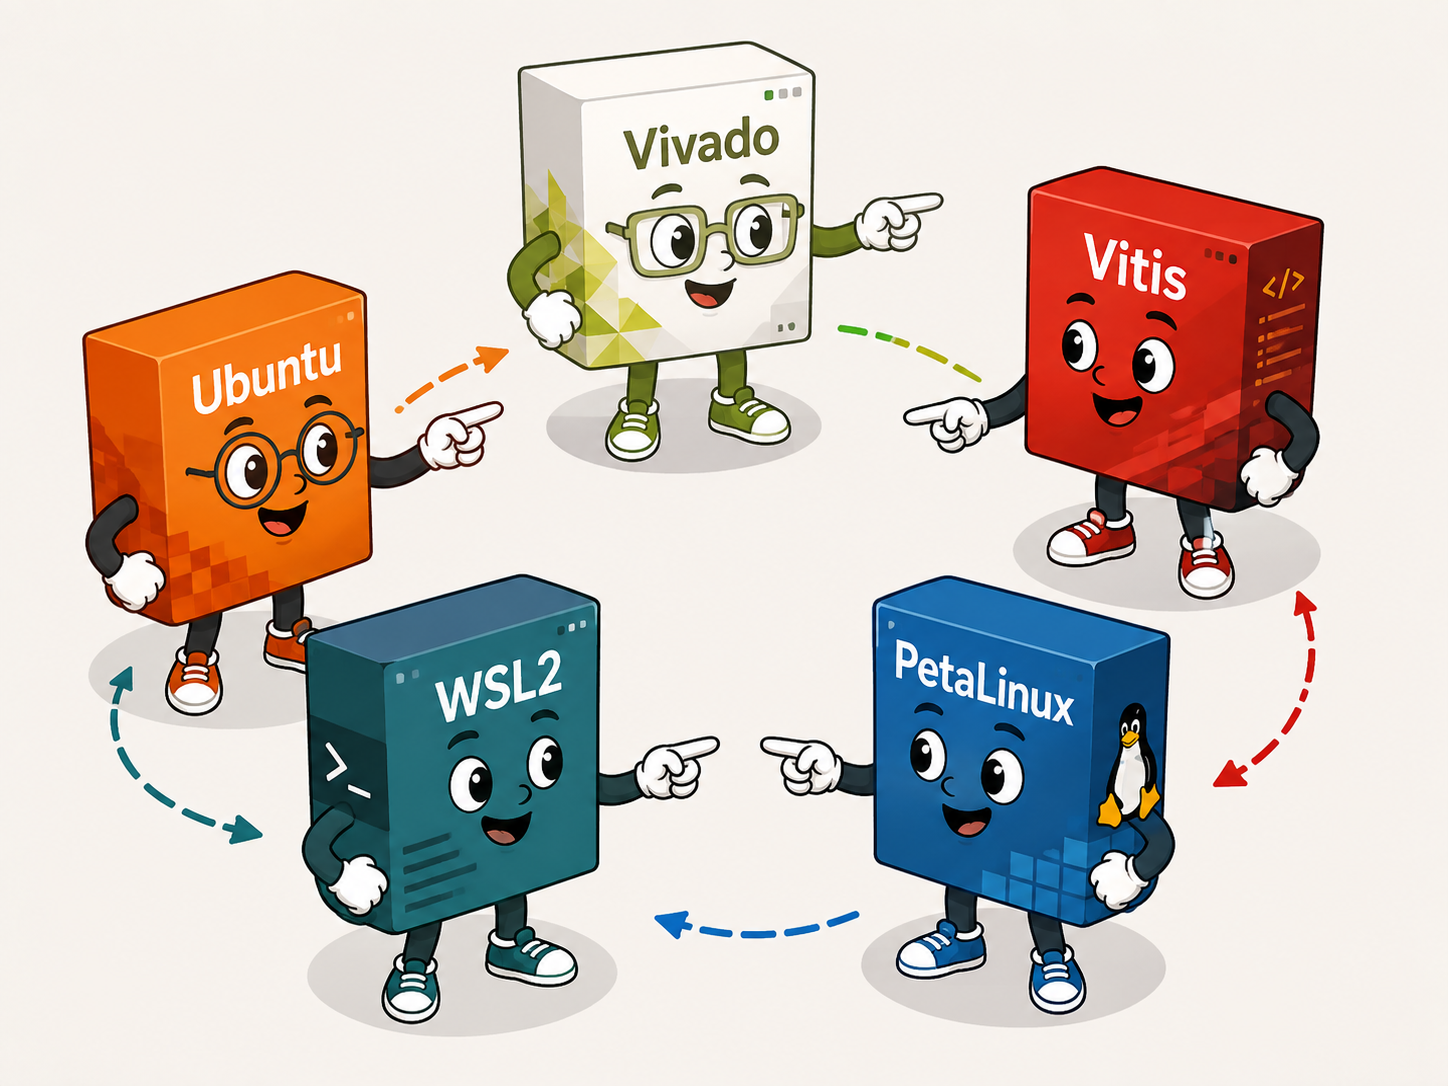
Before we begin working with the ZYBO, we need to install the software tools used throughout this tutorial series.
The development environment will include:
Vivado Design Suite
Vitis Unified Software Platform
Windows Subsystem for Linux 2
Ubuntu
PetaLinux Tools
This page focuses only on installing the required tools. We will begin creating projects and using the development workflow in later sections.
Important: Use Version 2025.2
This tutorial series was developed and tested using the AMD 2025.2 toolchain.
Although newer versions of the tools may work, AMD periodically changes menus, user interfaces, project structures, commands, and development workflows. If you install a different release, the screens and steps shown throughout this series may not match what you see on your system.
To make the tutorial easier to follow, install the 2025.2 versions of Vivado, Vitis, and PetaLinux.
Using matching versions also helps prevent compatibility problems when hardware created in Vivado is later used by Vitis or PetaLinux.
Once you are comfortable with the complete development process, moving to a newer release will be much easier.
Vivado Design Suite & Vitis Unified Software Platform
Official 2025.2 download page:
Vivado and Vitis are installed using AMD's Unified Installer, so there is no need to download them separately. During installation, simply select both products.
Vivado Design Suite
Vivado is AMD's primary FPGA development environment. Throughout this tutorial series, we'll use Vivado to configure the Zynq Processing System, create custom hardware using VHDL, integrate IP cores, connect AXI interfaces, assign FPGA pins, and generate the FPGA bitstream.
Vivado also exports the hardware description (.xsa) that is later used by both PetaLinux and Vitis.
Vitis Unified Software Platform
Vitis is AMD's software development environment for the ARM processors contained within the Zynq Processing System.
Depending on the project, Vitis can be used to develop bare-metal applications, Linux applications, and software that communicates with custom hardware implemented in the FPGA fabric. Although we won't use Vitis immediately, it is an important part of the complete Zynq development environment and should be installed now.
Installing the Correct Version
On the download page, locate the section labeled:
Unified Installer for FPGA & Adaptive SoC Tools — 2025.2
Download the Windows installer and confirm that the page and installer both identify the release as 2025.2 before continuing.
Although newer versions of the tools are available, this tutorial series was developed using the 2025.2 toolchain. Installing a different version may result in menus, project settings, or workflows that differ from those shown throughout the series, making it more difficult to follow along.
Windows Subsystem for Linux 2
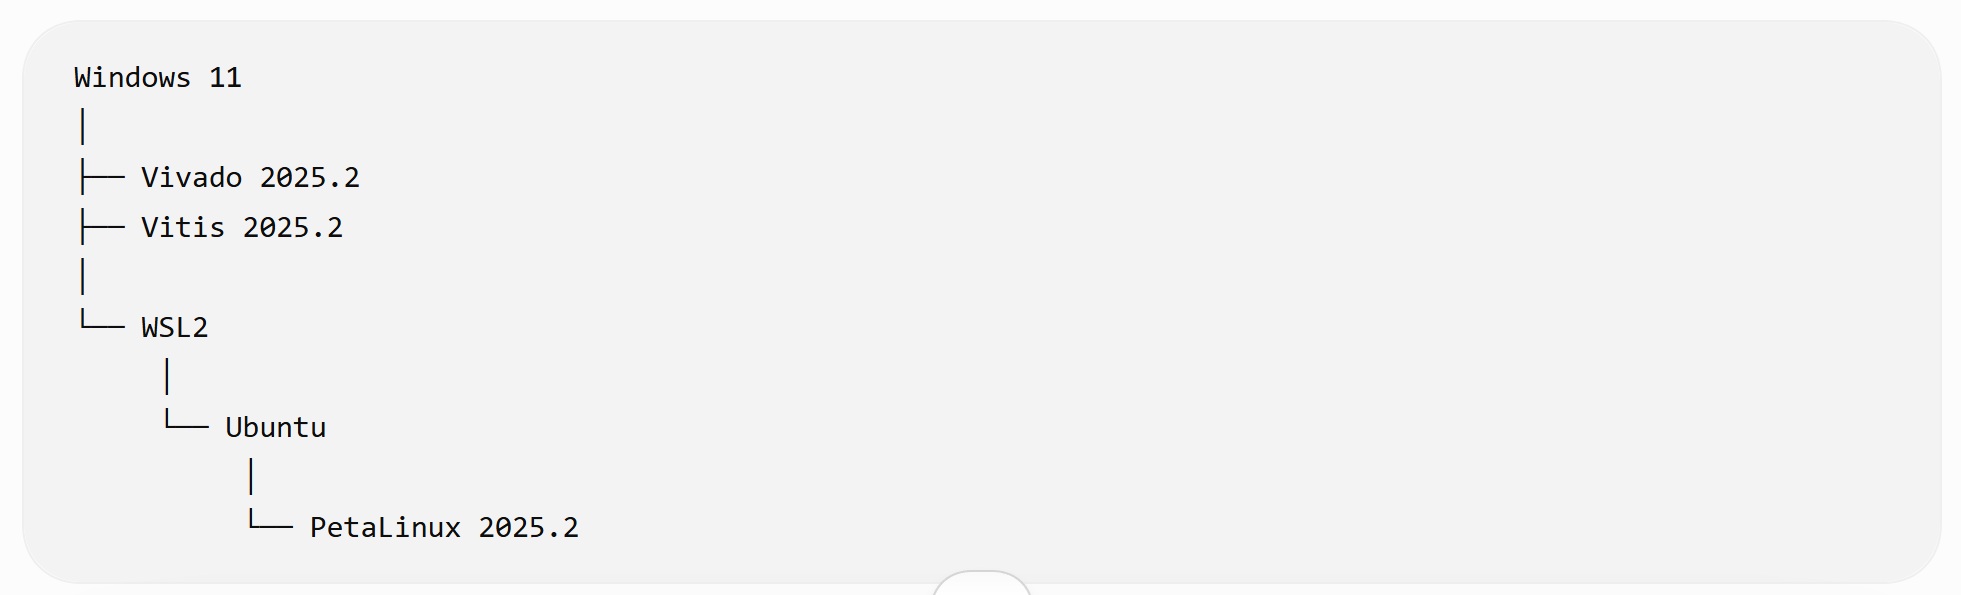
Windows Subsystem for Linux 2 (WSL2) allows us to run a Linux environment directly alongside Windows 11 without dedicating the computer to Linux or maintaining a traditional dual-boot configuration.
For this project, Windows remains the primary desktop operating system. Vivado can run on the Windows side, while PetaLinux runs inside Ubuntu under WSL2. WSL2 isn't the Linux distribution; it's the virtualization/environment layer that allows Ubuntu to run on Windows.
Conceptually:
Installing WSL2 on Windows 10/11
Installing WSL2 on a modern version of Windows requires only a few steps.
Open Command Prompt as Administrator.
Type
cmdinto the Windows search bar. When Command Prompt appears, select Run as administrator.Install Windows Subsystem for Linux.
At the Command Prompt, enter:
wsl --install --no-distribution
The
--no-distributionoption installs WSL without installing a Linux distribution. We will install Ubuntu separately in the next section.This command installs WSL and enables the Windows components required by WSL2.
Restart Windows.
Once the installation has completed, restart the computer so Windows can finish enabling the required components.
Verify that WSL2 is installed.
After Windows restarts, open Command Prompt again and enter:
wsl --status
WSL2 should be the default version for newly installed Linux distributions. To explicitly set WSL2 as the default, enter:
wsl --set-default-version 2
At this point, the Windows Subsystem for Linux environment is ready.
We still don't have a Linux operating system installed inside it, however. In the next section, we'll install Ubuntu, which will provide the Linux environment used to run PetaLinux.
Ubuntu
PetaLinux does not run directly within Windows. Instead, we will run PetaLinux inside an Ubuntu Linux environment hosted by WSL2.
For this tutorial series, we will use Ubuntu 22.04 LTS. This is important because the operating system version, just like the Vivado and PetaLinux versions, can affect whether the commands and installation steps shown throughout the tutorial work as expected.
Check the Available Ubuntu Distributions
Open Command Prompt and enter:
wsl --list --online
Windows will display the Linux distributions currently available for installation.
Locate the Ubuntu 22.04 distribution in the list. The distribution name should appear similar to:
Ubuntu-22.04
Install Ubuntu 22.04
Install Ubuntu using:
wsl --install -d Ubuntu-22.04
Windows will download and install the Ubuntu distribution into WSL2.
Once the installation has completed, launch Ubuntu 22.04 from the Windows Start menu.
The first time Ubuntu starts, it will complete its initial setup and ask you to create a Linux username and password.
This account exists inside Ubuntu and is separate from your Windows account.
Note: When entering your Linux password in the terminal, no characters will appear on the screen. This is normal behavior in Linux.
Update Ubuntu
Before installing PetaLinux, we need to update the newly installed Ubuntu environment.
This step is important. During development of this tutorial, attempting to work with PetaLinux before updating the Ubuntu installation resulted in package and build problems.
From the Ubuntu terminal, run:
sudo apt update
This updates Ubuntu's local package information.
Next, upgrade the currently installed packages:
sudo apt upgrade -y
The
-yoption automatically answers yes when Ubuntu asks for permission to install the updates.Depending on how old the Ubuntu image is, this process may take several minutes.
Verify the Ubuntu Version
Once the update has completed, verify the installed Ubuntu release:
lsb_release -a
The output should identify the system as Ubuntu 22.04 LTS.
Verify That Ubuntu Is Running Under WSL2
Return to a Windows Command Prompt and enter:
wsl --list --verbose
You should see Ubuntu listed with version 2:
NAME STATE VERSION
Ubuntu-22.04 Running 2At this point our development environment looks like this:
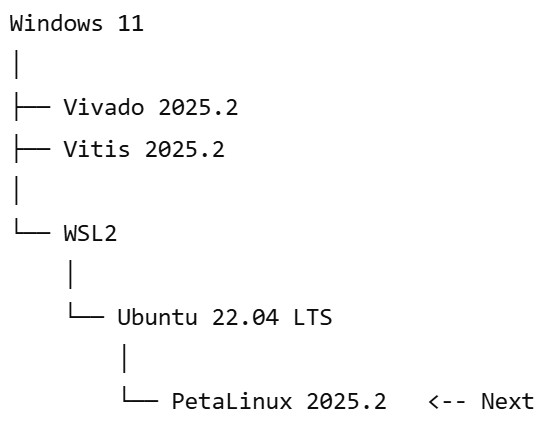
With Ubuntu installed and updated, we now have the Linux environment required to install PetaLinux.
PetaLinux Tools
PetaLinux is AMD's embedded Linux development environment for Zynq devices. It is used to create and customize the bootloader, Linux kernel, device tree, root filesystem, and boot images that will eventually run on the ARM processors inside the ZYBO.
Unlike Vivado and Vitis, PetaLinux does not run directly under Windows. It will be installed inside the Ubuntu 22.04 environment that we just created using WSL2.
For this tutorial series, we will use PetaLinux 2025.2 so that it matches the version of Vivado used to create our hardware.
Installing PetaLinux 2025.2
Official PetaLinux 2025.2 download page:
Download PetaLinux 2025.2
Go to AMD's official PetaLinux download page and locate:
PetaLinux Tools — Installer — 2025.2
The installer filename should be:
petalinux-v2025.2-11160223-installer.run
You may be required to sign in with an AMD account before the download begins.
If you downloaded the installer using your Windows web browser, the file will normally be located in your Windows Downloads folder. WSL2 makes the Windows C: drive available to Ubuntu under
/mnt/c/.For example:
cd ~
cp /mnt/c/Users/<WindowsUserName>/Downloads/petalinux-v2025.2-11160223-installer.run ~/Replace
<WindowsUserName>with your Windows account name.This copies the installer into your Ubuntu home directory, where we will perform the installation.
Install the Required Linux Packages
A new Ubuntu installation does not contain all of the development tools required by PetaLinux.
From the Ubuntu terminal, install the packages used by our development environment:
sudo apt install -y build-essential gcc g++ xterm autoconf libtool texinfo zlib1g-dev gcc-multilib libncurses-dev libtinfo5
These packages provide compilers, build utilities, terminal support, and development libraries used by PetaLinux and its underlying Yocto build system.
Configure Bash as the Default System Shell
PetaLinux expects
/bin/shto use Bash rather than Ubuntu's default Dash shell.
Run:sudo dpkg-reconfigure dash
When Ubuntu asks:
Use dash as the default system shell (/bin/sh)?
Select:
No
This configures/bin/shto use Bash.Create the PetaLinux Installation Directory
We will keep the PetaLinux installation inside our Linux home directory. Create the directory:
mkdir -p ~/petalinux/2025.2
Keeping the version number in the directory name makes it easier to maintain multiple PetaLinux releases in the future.
Make the Installer Executable
The downloaded
.runfile must be given permission to execute. From your Ubuntu home directory, run:chmod 755 petalinux-v2025.2-11160223-installer.run
Install PetaLinux
Run:
./petalinux-v2025.2-11160223-installer.run --dir ~/petalinux/2025.2
Do not use
sudowhen running the PetaLinux installer. PetaLinux is intended to be installed and used from a normal Linux user account.During installation, you will be asked to review and accept the PetaLinux and third-party software license agreements.
Allow the installation to complete before continuing.
Load the PetaLinux Environment
Installing PetaLinux does not automatically make its commands available in every Ubuntu terminal.
Before using PetaLinux, its environment setup script must be loaded:
source ~/petalinux/2025.2/settings.sh
This configures the environment variables and command paths required by the PetaLinux tools.
You will need to run this command whenever you open a new Ubuntu terminal and intend to use PetaLinux.
Verify the Installation
Check that the PetaLinux environment has been loaded:
echo $PETALINUX
The command should return a path pointing to the PetaLinux 2025.2 installation. We can also verify that Ubuntu can find the PetaLinux tools:
which petalinux-create
The command should return the location of the
petalinux-createexecutable.
At this point, PetaLinux 2025.2 is installed and ready for use.
We are not going to create a Linux project yet. Before PetaLinux has anything useful to build, we first need to create the ZYBO hardware platform in Vivado and export its hardware description.
Before Continuing
At this point, the complete development environment for this tutorial series should be installed.
You should now have:
Vivado Design Suite 2025.2 installed under Windows
Vitis Unified Software Platform 2025.2 installed under Windows
WSL2 enabled
Ubuntu 22.04 LTS installed and updated under WSL2
PetaLinux Tools 2025.2 installed inside Ubuntu
The important part is that all three AMD development tools use the same 2025.2 release. The hardware platform that we create in Vivado will later be exported and passed into PetaLinux and Vitis, so keeping the tool versions synchronized prevents unnecessary compatibility problems.
Our development environment is now complete.
From here, we can finally stop installing software and start working with the ZYBO.
The next step is to open Vivado 2025.2 and begin building the hardware platform that will eventually become the foundation of our embedded Linux system.